

Although Symantec SiteMinder runs in the cloud, some customers have elected to use AWS’ Cognito (Cognito) as SAML Service Provider (SP) to authenticate users. This article will provide the steps necessary to configure SiteMinder to serve as the Identity Provider (IdP) between on premise enterprise authoritative identity repository and cloud-based applications protected by Cognito. We will highlight the steps required to setup SiteMinder as the IdP for this type of integration. As Cognito currently does not support encrypted assertions, AWS has stated that encrypted assertion support is on their roadmap but has not published a date when it will be available. Also, Cognito only supports SP-initiated SAML flow.
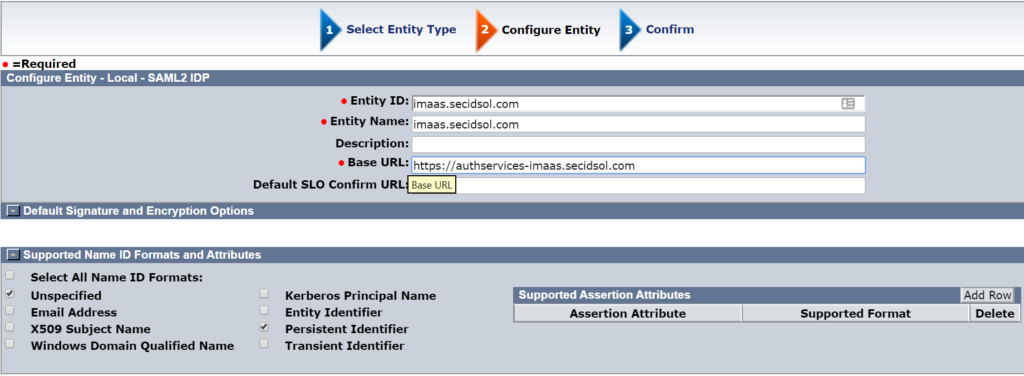
Create a Local IdP entity in the SiteMinder WAMUI
Create a local IdP entity in the SiteMinder WAMUI for your IdP. Most organizations would use ‘Unspecified” as the NameID format, but Cognito is expecting “Persistent Identifier” as the NameID format. Make sure you select that option before confirming the IdP entity.
Gather Required Information
In most deployments, we would create the SP entity in the WAMUI, but directly inputting the Cognito SP details results in an error when you attempt to save the entity. Apparently, the values of the entity ID cause the creation to fail. We will import the entity information into the WAMUI to avoid this error.
Copy Pool Id from Cognito
First, we need to get the Pool Id from Cognito. This information can be found on the General Settings tab of the User Pool for your application.

Copy the Signing Certificate
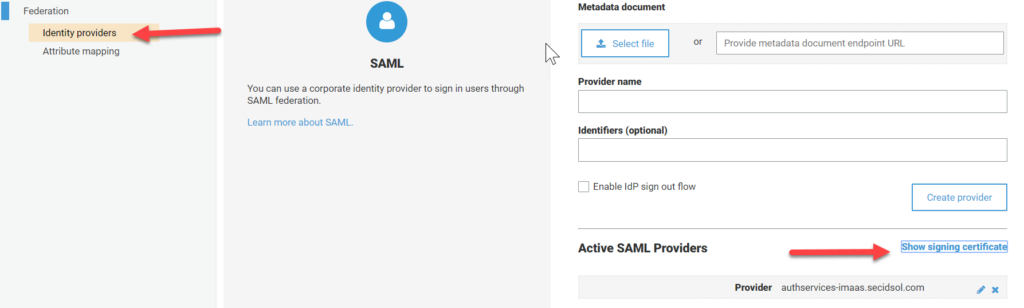
Next, we will need the signing certificate from Cognito because it only supports SP-initiated SAML and SiteMinder will need to validate the unsolicited requests from Cognito. On the same page, select Identity Providers under Federation, then select SAML and choose show signing certificate.
After selecting “Show signing certificate”, the following will appear.
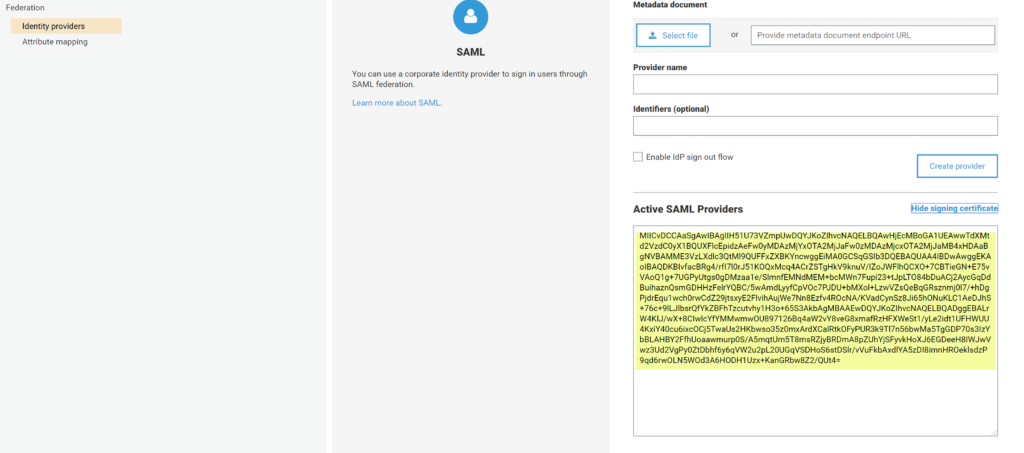 Copy the text from certificate box and paste it into a text file. Be sure to save it with an certificate extension such as ‘.crt’.
Create a Remote SP entity in the SiteMinder WAMUI
Import Certificate into WAMUI
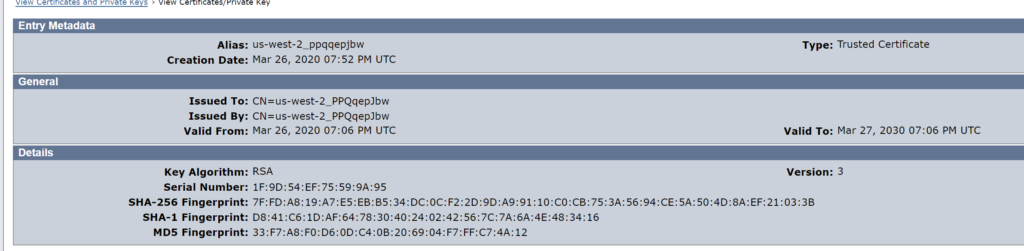
In the WAMUI, navigate to Infrastructure –> X509 Certificate Management –> Trusted Certificates and Private Keys. Select Import New and target the certificate file that was copied from Cognito.
The imported certificate will resemble the following.
Create the Import Template for the SP
We will use the value of the Pool Id as the “entityId” in the template.

On Line 2, the entityID value from Cognito is used. Please note that the highlighted location on Line 6 will be specific to your environment.
Import SP entity into the WAMUI
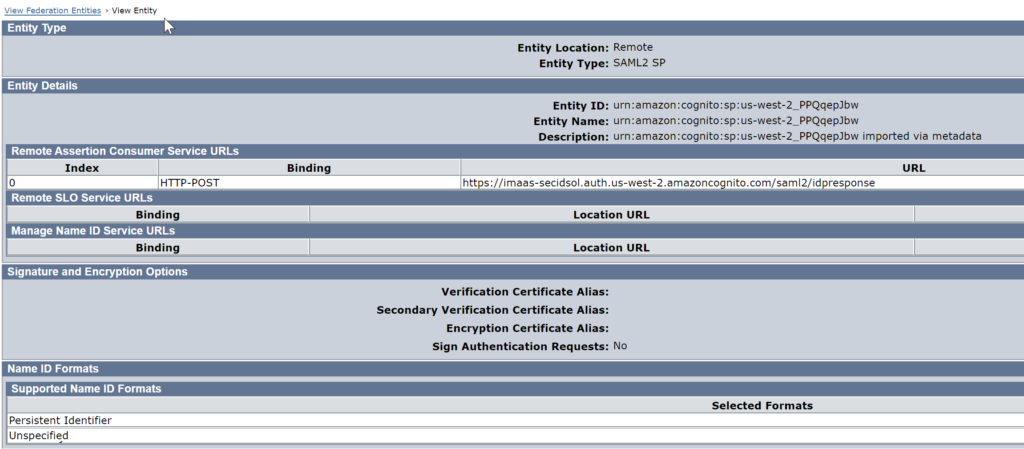
After saving the file, you can import it into the WAMUI as a remote SP. The following image is the result of the import.
Create Partnership in WAMUI
Create the partnership in the WAMUI. Make sure you select Persistent Identifier as the Name ID Format and select the Cognito signing certificate as the verification certificate. Additionally, do not enable encryption because Cognito does not support it at this time.
Create the IdP in Cognito
Export the Metadata for the partnership
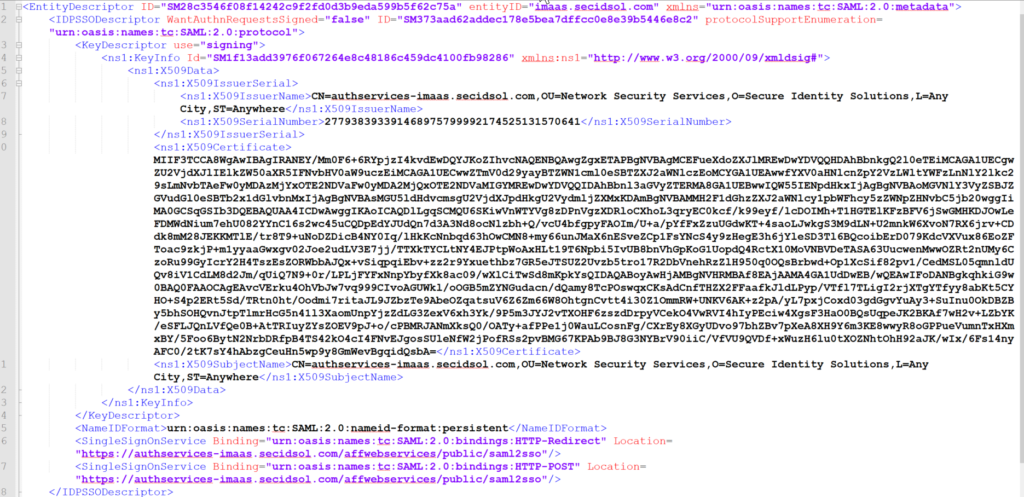
We need to get the metadata from SiteMinder before importing it into Cognito. Export the metadata for the partnership and it will resemble the following.
Import the Metadata into Cognito
In the Cognito console, select Identity Providers and then select SAML. Choose ‘Select file’ and target the location of the exported metadata from the previous step. Enter the name of the provider. If you are going to use single log out (SLO), make sure you check the box next to “Enable IdP sign out flow”. (Note: You will need to configure SLO in the SiteMinder WAMUI as well). Use the Create Provider button to save the identity provider.

Test Your Configuration
You will need to determine what your test SP URL is to validate the configuration, but it should resemble the following:
https://imaas-secidsol.auth.us-west-2.amazoncognito.com/saml2/idpresponse?response_type=token&client_id=75e4f8q4od7mj3k248dt5ofmvg&redirect_uri=https%3A%2F%2Flocalhost%3A8081%2Fprovider%2Fcognito
- The URL for your Cognito instance will be different.
- You will need to copy your client_id from the user pool. Select App client settings to view it.
- The redirect_uri should point to your application and match what is defined for your application in AWS.
Conclusion
We hope this walk-through has been helpful. If you need assistance with your solution, please reach out to Secure Identity Solutions. Additionally, if an SP-initiated flow is not ideal for your implementation, we can help your team implement a flow that mimics an IdP initiated flow.
Note
The XML template presented earlier in this document may be hard to replicate, so we have included the text version of the template that you can edit for your environment.
<?xml version="1.0" encoding="UTF-8" standalone="yes"?>
<EntityDescriptor entityID="urn:amazon:cognito:sp:us-west-2_PPQqepJbw" xmlns="urn:oasis:names:tc:SAML:2.0:metadata">
<SPSSODescriptor AuthnRequestsSigned="false" WantAssertionsSigned="false" protocolSupportEnumeration="urn:oasis:names:tc:SAML:2.0:protocol">
<NameIDFormat>urn:oasis:names:tc:SAML:2.0:nameid-format:persistent</NameIDFormat>
<NameIDFormat>urn:oasis:names:tc:SAML:1.1:nameid-format:unspecified</NameIDFormat>
<AssertionConsumerService index="0" isDefault="false" Binding="urn:oasis:names:tc:SAML:2.0:bindings:HTTP-POST" Location="https://imaas-secidsol.auth.us-west-2.amazoncognito.com/saml2/idpresponse"/>
</SPSSODescriptor>
</EntityDescriptor>

