

Purpose
We were asked to implement a mechanism that would be able to accommodate a communications failure or email server outage when Identity Manager (IDM) attempts to send emails. As this kind of email scheduling can be used in a variety of use cases, we wanted to share it and allow you to adapt it for your own purposes.
Overview
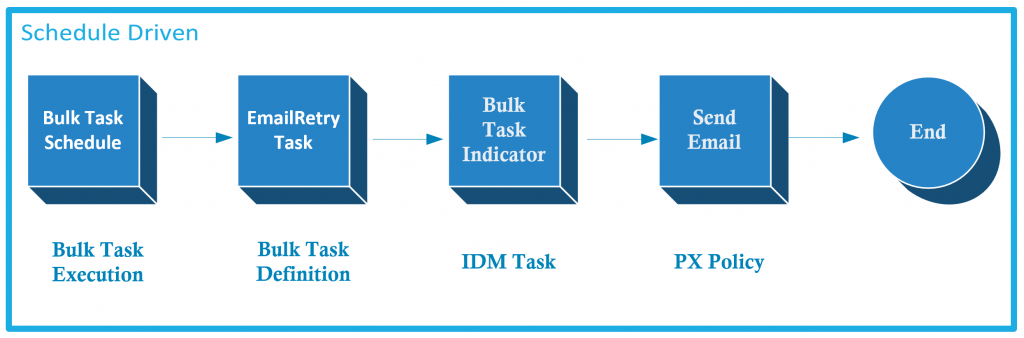
The following is an overview of how the Identity Manager tasks and Policy Xpress (PX) policies work together to achieve this objective. As seen below, the first portion of the solution is event driven, while the second portion is schedule driven.

Solution Steps
In order to solve the aforementioned problem, the following six steps are required.
- Update an existing modify or creation task with an email type placeholder
- Create a PX policy to populate the email type
- Create a trigger task for bulk task execution
- Create a PX policy to send email and clear process flags
- Create a bulk task definition to execute the trigger task
- Create a bulk task schedule to the email sender
Modify an Existing Task
For our example, emails can be triggered by the following:
- new user creation
- user profile changes
- password changes
We are using a custom password reset task based on a standard user modify task. We will update the modify task to trigger the addition of the email type to the user profile.
- Add an attribute to an existing Modify or Create profile screen to contain the email type for the user. For example, destinationIndicator can be added to a modify or create task.
Create a PX Policy
Now that the email type field has been added, this policy will populate it.
- Create a Policy Xpress policy that will fire when the associated task is executed.
- Configure the PX policy to populate the destinationIndicator attribute with the email type indicator ‘PR_Email’. You can use any value you want here; we use the ‘PR’ suffix for ‘Password Reset’.

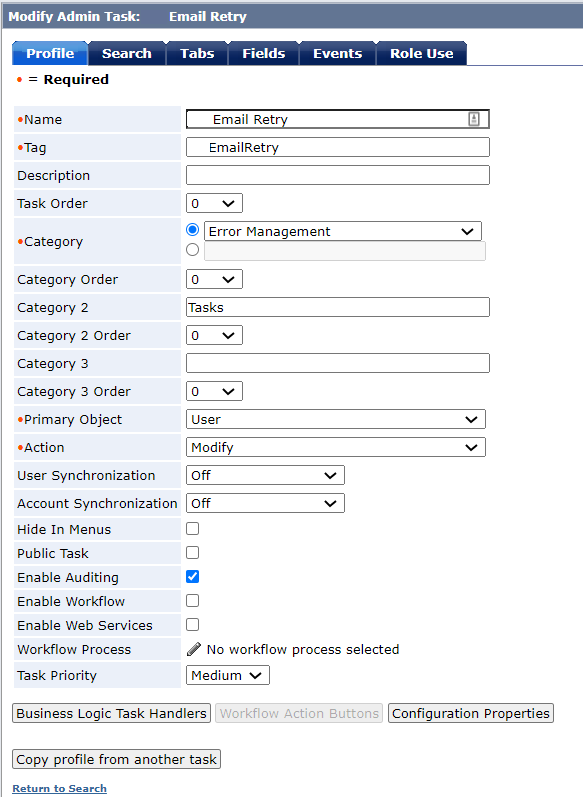
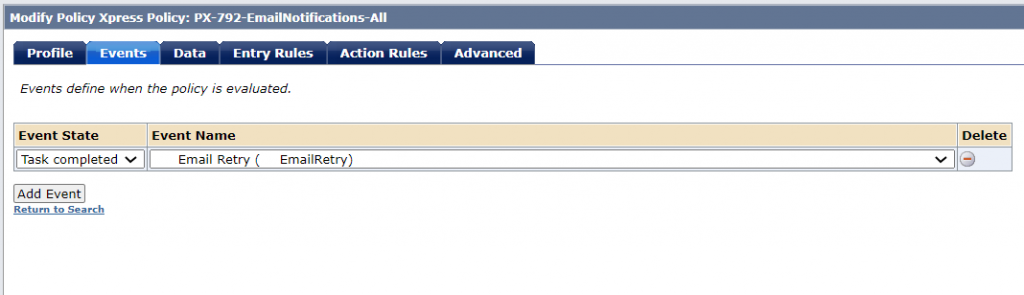
Create a Trigger Task
We need a task that will be responsible for triggering the process, so we create it in this step.
- Copy the default modify user task. Set the categories and category orders to meet your requirements. Ensure that User Synchronization and Account Synchronization attributes are both turned off.
- This task should only apply to users that have a value in the email type field. In order to do this, we need to create a search screen that only returns users that have the email type indicator (destinationIndicator, in this case) field populated.
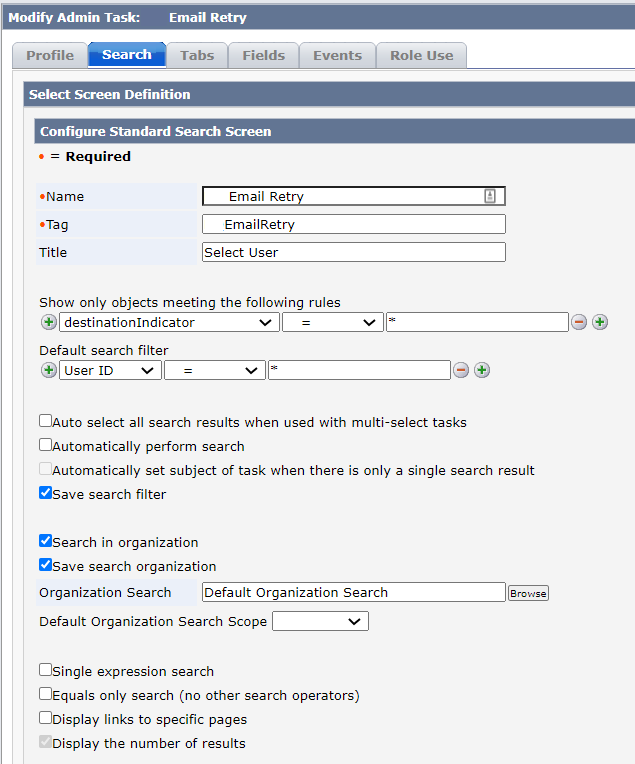
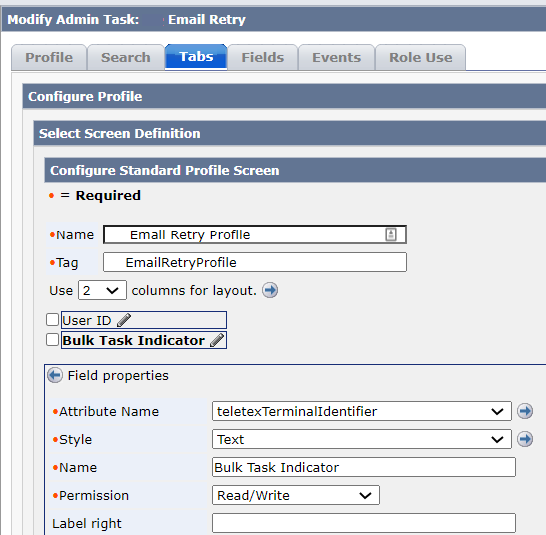
- Create a new profile screen by copying an existing profile screen. As shown below, include two attributes on this screen: ‘User ID’ and ‘Bulk Task Indicator’.
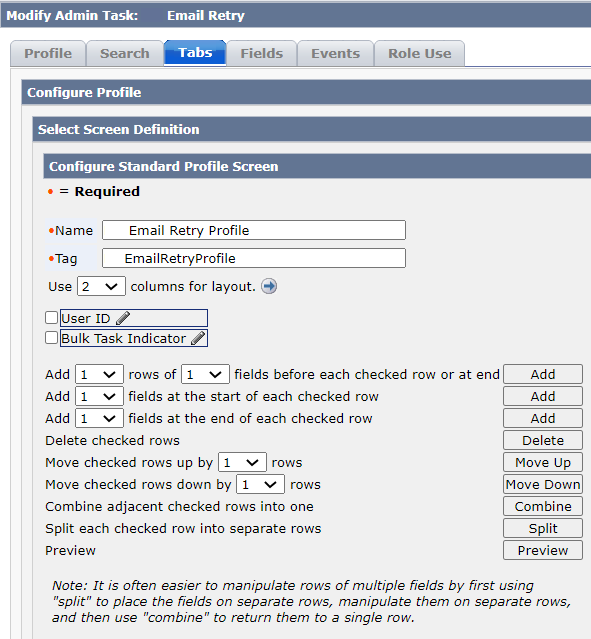
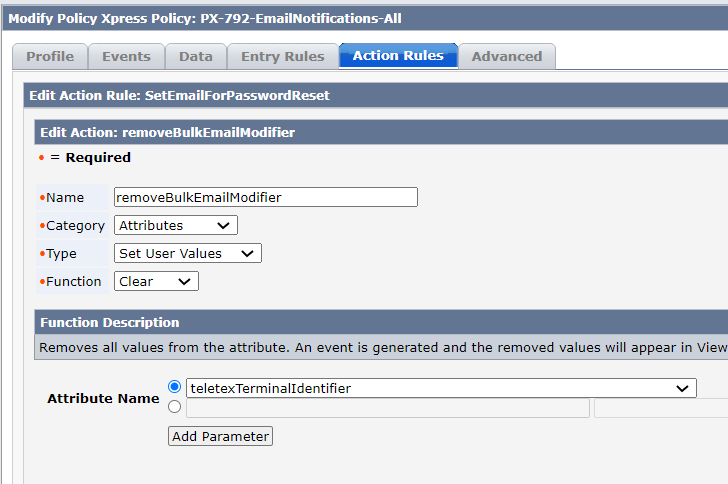
The standard User ID attribute on the screen can be left unchanged. Create an IDM attribute named Bulk Task Indicator that is bound to an unused LDAP attribute. In the following diagram, we are using teletexTerminalIdentifier for this purpose. Ensure that the Bulk Task Indicator field has Read/Write permissions assigned.
- To complete the creation of the trigger task, assign the new task to the role that has the permissions required to execute bulk tasks and modify the users.
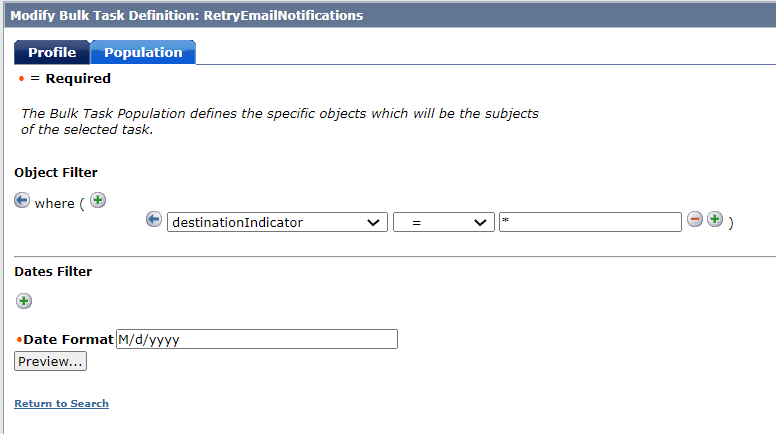
Bulk Task Definition
Create a bulk task definition that will be used to trigger the PX sending the emails.
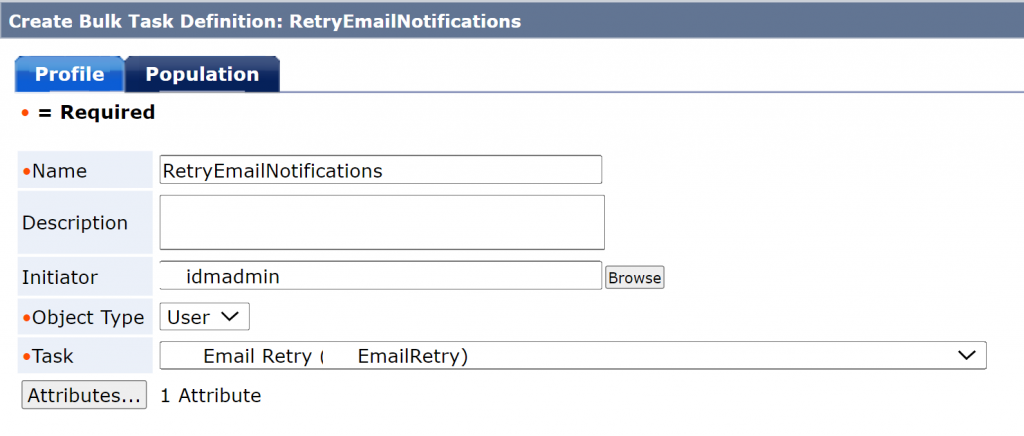
- As illustrated below, create a bulk task definition that is bound to the task created above (Email Retry, in this example).
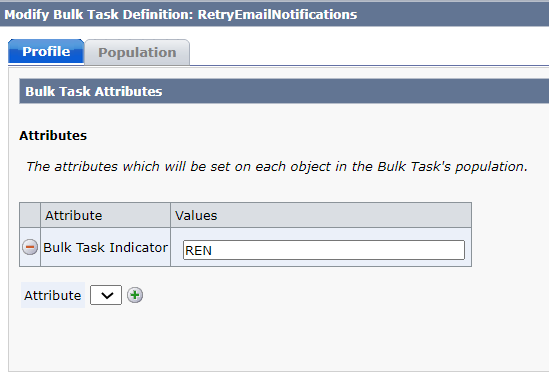
- Add the bulk task indicator attribute and enter a value for the attribute. The value of the attribute is not important because we are only using the attribute as a flag. The PX policy that is responsible for sending emails will clear this field.
- This bulk task should only apply to users who have an email type; in order to do this, we need to modify the population to only return users that have the email type field (destinationIndicator) populated.
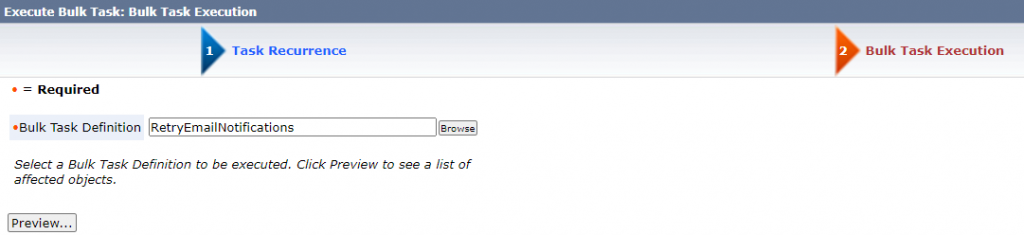
- Schedule a bulk task execution to run the Email Retry task regularly. In this example, we have set the task to execute every 5 minutes (see the Cron Expression below).
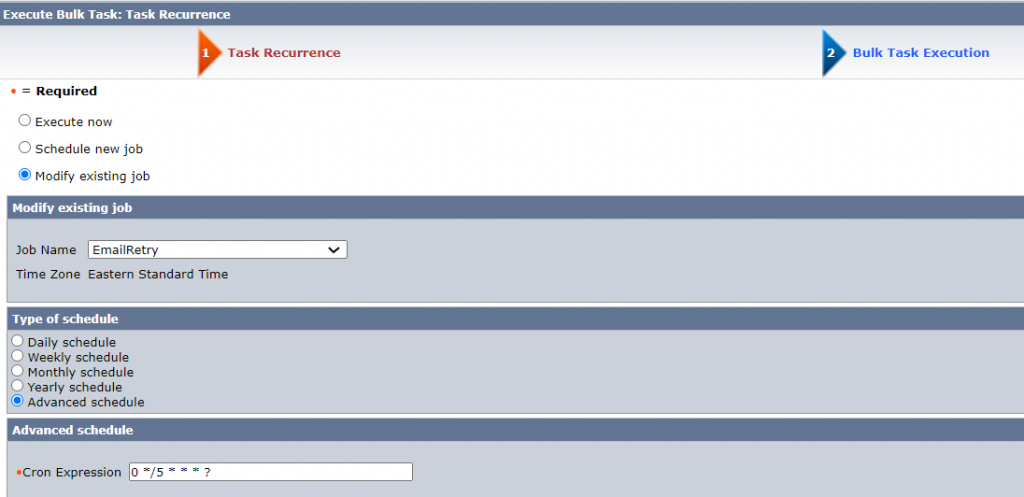
- Next, bind the execution to the bulk task definition, RetryEmailNotifications.
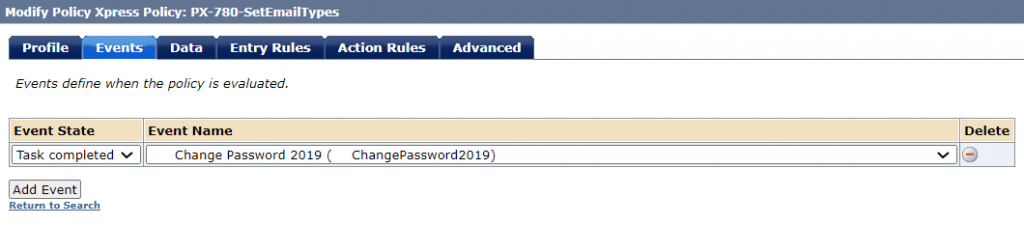
Create a Policy Xpress Policy
This PX policy is used to send emails and ensures that the function is reattempted should there be a local email sending failure.
- Create a new Policy Xpress policy to the send the emails.
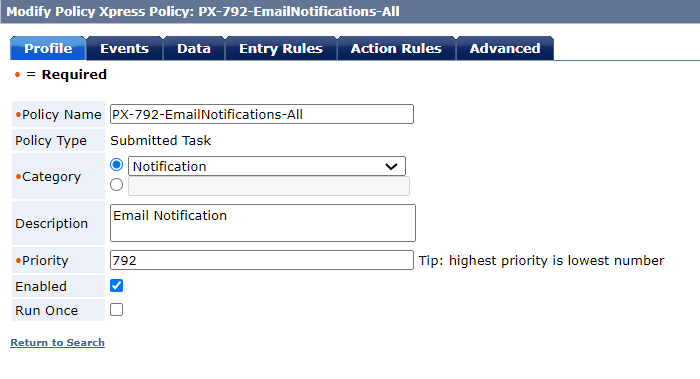
- Bind the policy to the Email Retry task execution.
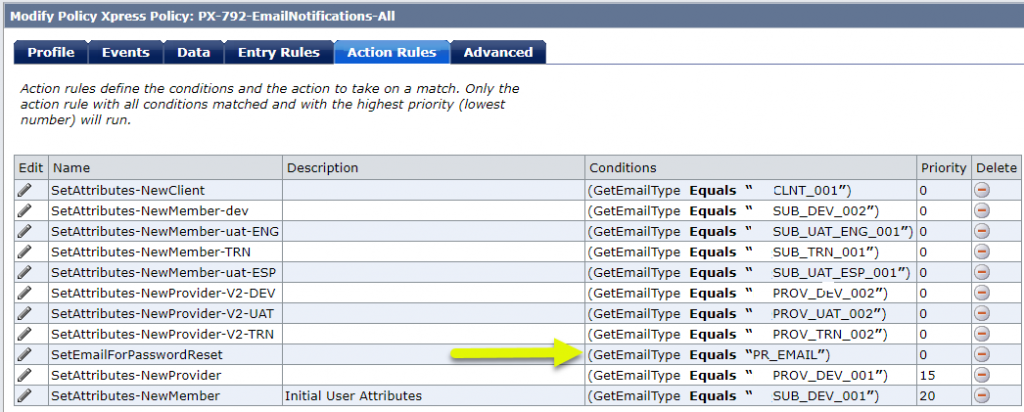
- Create action rules for each type of email you will be sending. We are sending a forgotten password email which has an identifier of PR_EMAIL.
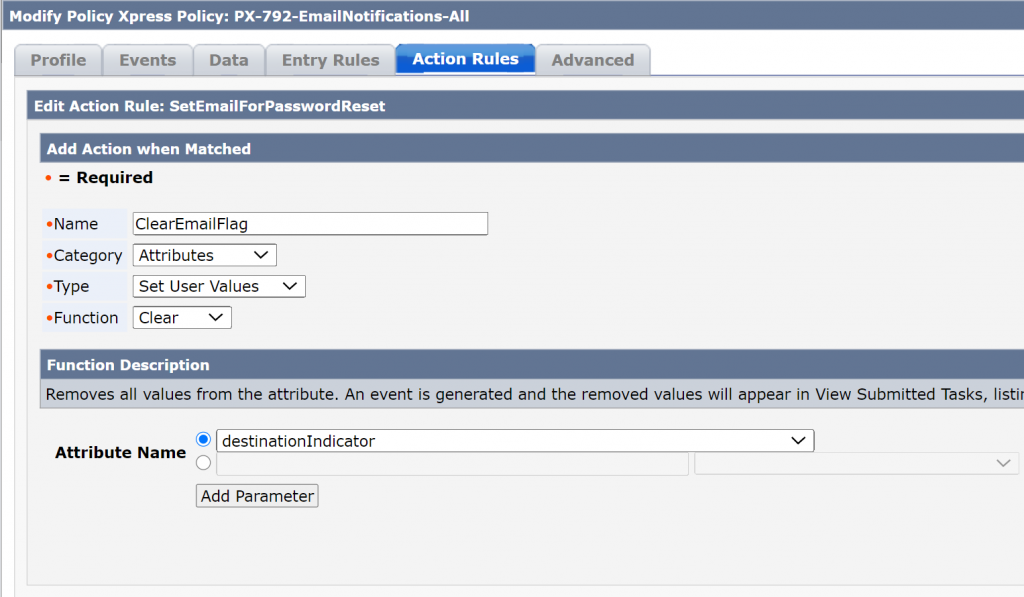
- Create an action that will remove the bulk task indicator (teletexTerminalIdentifier) value populated by the bulk task execution when the task executes successfully.
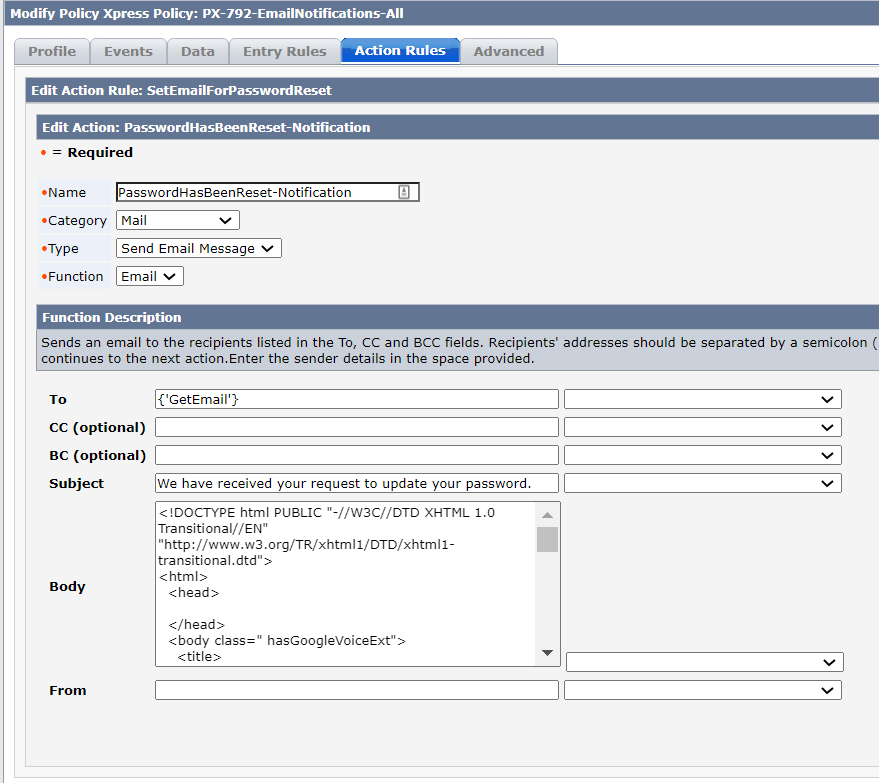
- Create an email action that contains the desired email content. In our example, we use an HTML formatted email.
- Add another action that will clear the email type (destinationIndicator).
- Finally, on the advanced tab, change the responses to the error categories to match the following:
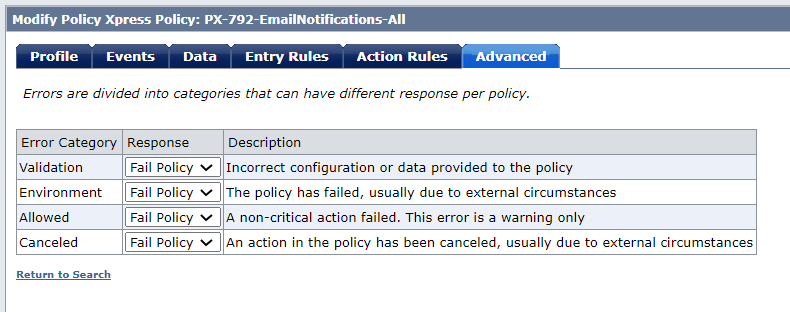
If the responses above are not set to Fail Policy, IDM would execute the entire policy during the email action even if it failed to communicate with the email server. As a result, IDM would never attempt to send the email again, as the last action in the sequence removes the value in the email type field (destinationIndicator). With the recommended configuration, if the email is not successfully sent, it will be reattempted when the bulk task scheduler runs again.
Wrap Up
We hope that you found this solution helpful! If you need any assistance with Symantec Identity Manager or SiteMinder, please contact us today.

